Links
The iMarket CMS Manager allows you to easily add a link in the content of your document to another page on your site or to another website.
Note: This entry is about content links only (i.e., it does not have information about adding weblinks to the Site Tree.) For information about adding weblinks to the Site Tree see: Creating and Editing Weblinks.
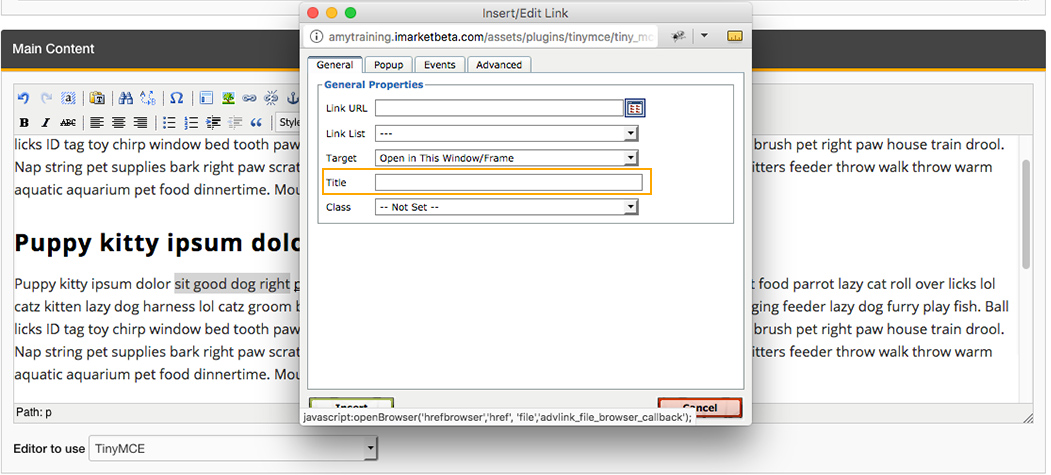
- To add a link, highlight the text or image you wish to use as a link. Then, click on the link icon in the TinyMCE toolbar. A dialog box will open where you can configure the settings of your link.
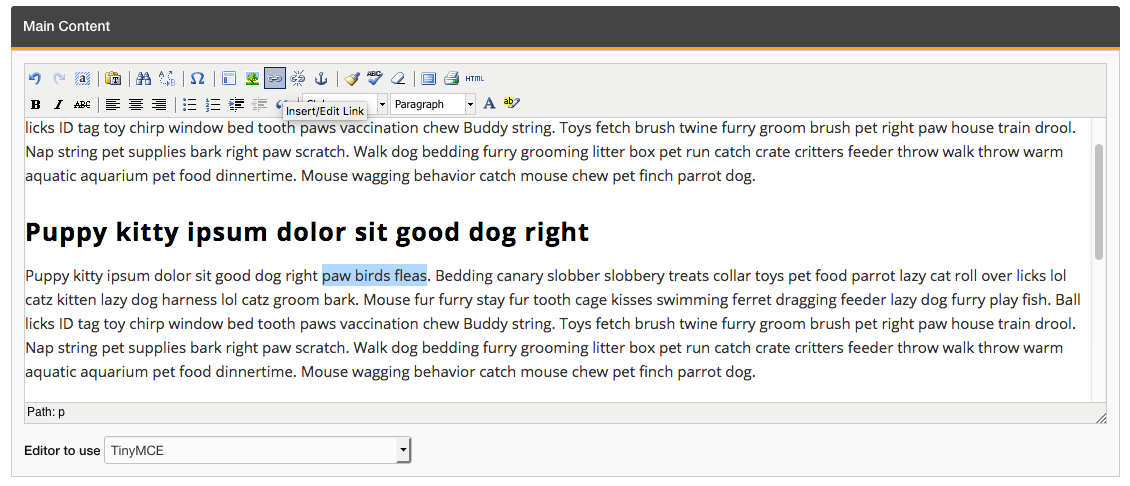
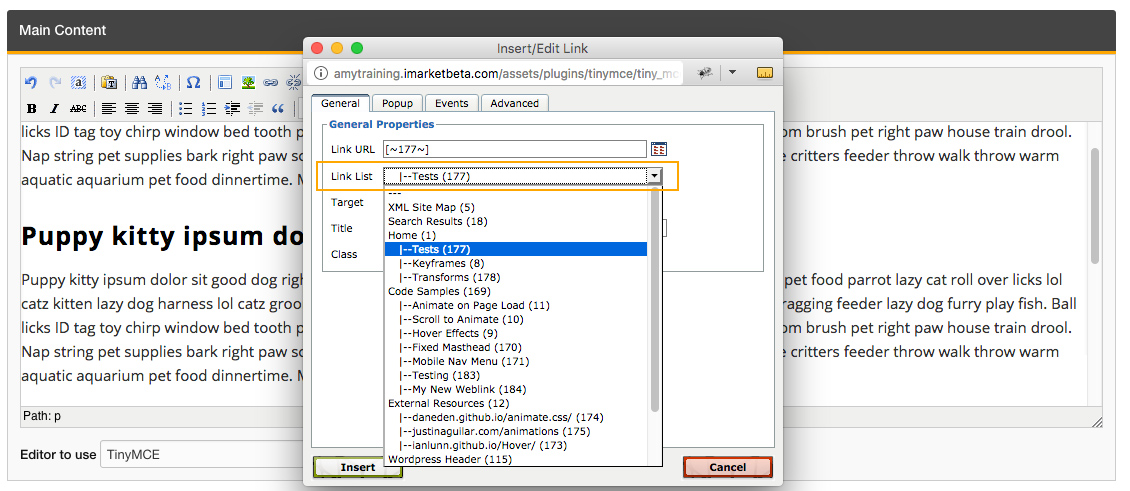
- When linking to an internal page on the website: Click on the dropdown labeled “Link list”. This will give you a list of all of the pages on your site. Click on the page to which you wish to link.
When linking to an external website: Enter the link’s full URL (e.g. http://www.google.com) by typing it or pasting it into the “Link URL” text field. Then, click on the drop-down menu labeled “Styles” and choose “External Link”. External Links should be used for links to other web sites but not to link to other pages on your web site, because it makes the page you’ve linked to open in a new browser tab.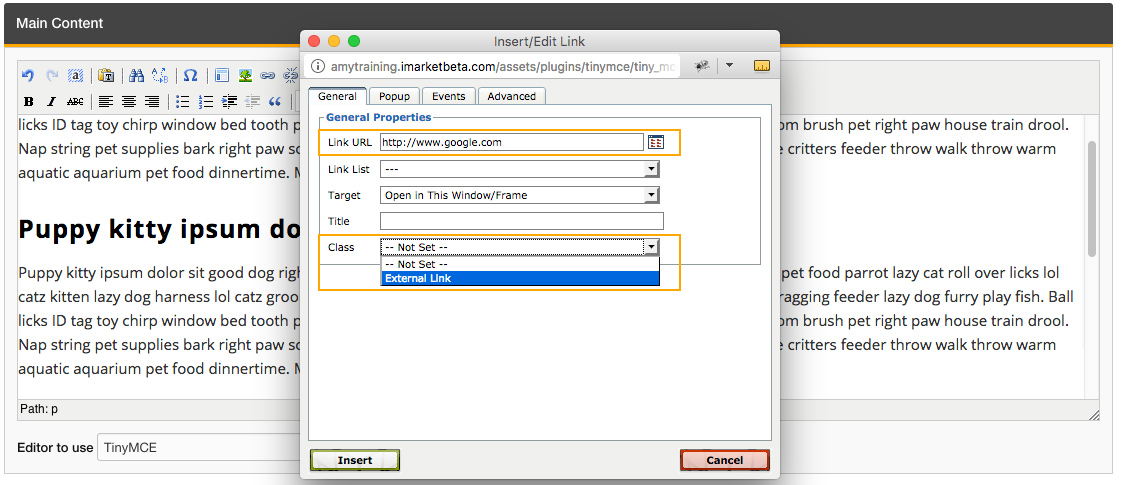 When linking to a file (such as a Word or PDF document): Click on the “Browse” link to the right of the Link URL field. A window will pop up that will allow you to choose a file from the web server, as well as to upload new files from your computer’s hard drive. At the bottom of this window there is an “Upload a new file in this folder” field. Click on the “Browse…” button and choose the file you wish to upload from your hard drive and click “OK”. Once you have done this, click the “Upload” button. Once the file has been uploaded, it will be available in the menu of linked documents. Click on the file to select it as the target of the link.
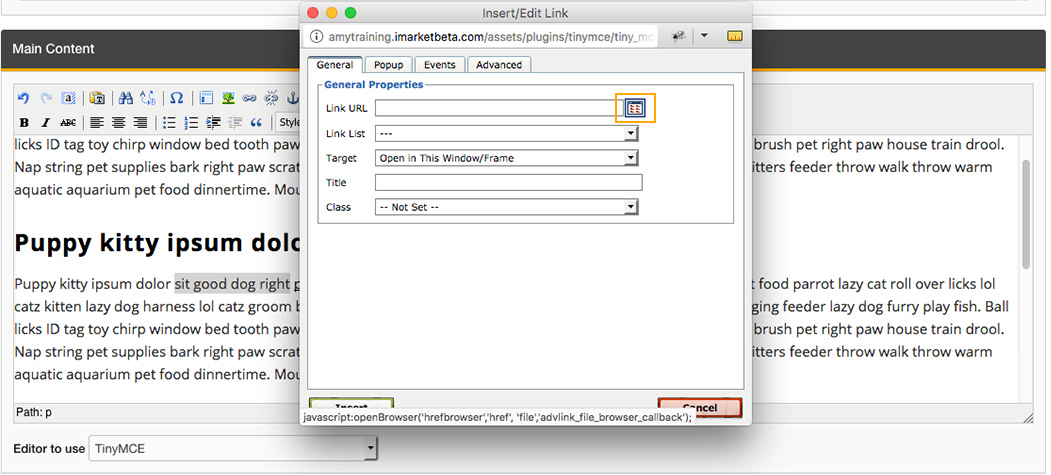
- All links should have be titled using the Title field. When users place their cursor over the link, the title will display as a tooltip (text inside of a small box). This is useful for providing extra information about the link and is also good for search engines.
Once you have set the link URL or chosen a link from the Link list, click the “Insert” button in the lower left corner of the window to insert the link into your document.
Adding On-Page Anchors
There may be situations where the amount of content on a single page calls for the use of on-page anchor tags – links that allow users to automatically jump from one spot to another instead of scrolling up and down the page. You may have seen this type of navigation on the Frequently Asked Questions section of some websites.
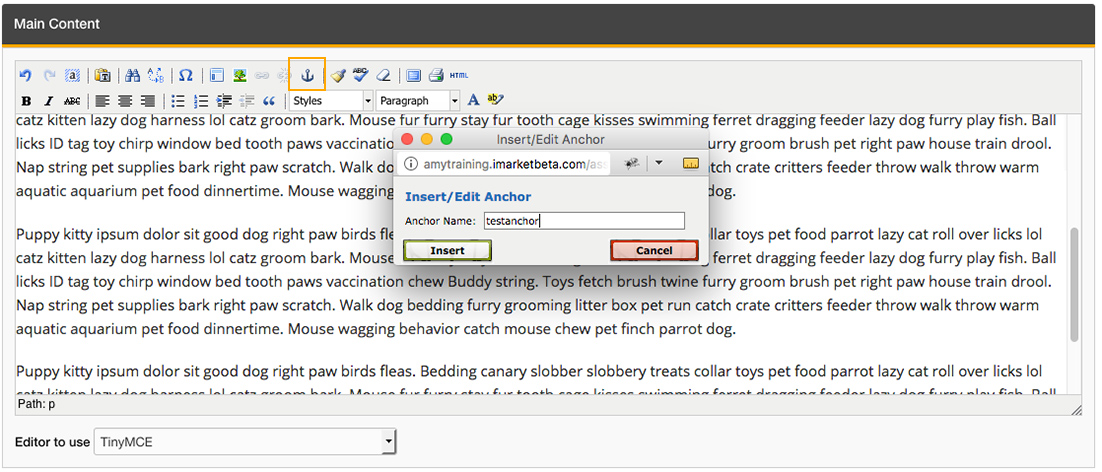
This is a two-step process – you’ll need to create both an anchor and then a link to it.
- First, to create an on-page anchor tag using the TinyMCE editor, place your cursor in the text box where you want the anchor to occur. An anchor is the spot on the page that the user will be sent to when the associated link you’ll create in step two is clicked. Click the anchor icon in the TinyMCE editor and name the anchor in the pop-up window that appears. When naming the anchor, make sure to use all lowercase letters and don’t use any spaces – use hyphens (-) in their place. Click the “Update” button and you’ll see the anchor icon appear in the content area (Note that users will not see this icon on the site).
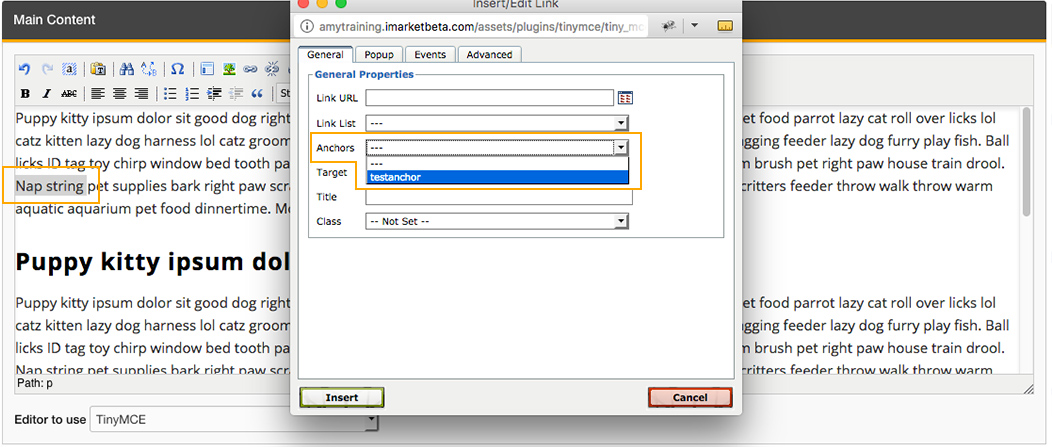
- Next you’ll need to set the link to that spot on the page, a process you’re already partly familiar with from the previous section. Create a link just as you would any other – add and select text that will act as the referring link and click the “Link” button in the formatting bar, but instead of using the “Link List” drop-down as you would for links to other pages and websites, select the on-page anchor link from the “Anchors” drop-down. Click “Update” and save the page.
Now, when you visit the page you’ve just edited on your website, you’ll notice when you click the link you’ve just created, the page jumps to the spot where you had previously inserted an anchor.
Best Practices
- Links to internal pages on the website should always be built using the dropdown “Link List” rather than entering in the URL manually.
If the page you are linking to is moved or renamed at a later date, it will still function properly using this method. - When linking to an internal resource, never link to a weblink.
If linking to another resource on the existing site, be sure to link to the actual page and not a weblink of the page. - Links to external website should always have the the Class “external” selected.
This will force the external link to open in a new tab, as well as adding a hover effect letting the user know the new tab will be opened.
- All links should have be titled using the Title field.
When users place their cursor over the link, the title will display as a tooltip. This provides a better user experience and is also good for search engines.
Last updated: